DIY hair serums have gained popularity in recent years as individuals seek natural and cost-effective alternatives to commercial hair care products. These lightweight, leave-in treatments are designed to address specific hair concerns such as frizz, dryness and damage. Typically, hair serums are formulated with a combination of oils, essential oils and other nourishing ingredients that help improve the overall health and appearance of the hair.
Creating one’s own hair serum at home allows for customisation of ingredients to suit specific hair types and concerns, whilst avoiding potentially harmful chemicals found in many commercial products. Regardless of whether one has dry, oily, curly or straight hair, there exists a DIY hair serum recipe to suit various needs. This article will explore the different ingredients that can be used to create a bespoke hair serum, as well as provide step-by-step instructions for making and using one’s own DIY hair serum.
Summary
- DIY hair serums are a cost-effective and natural way to nourish and protect your hair.
- Choosing the right ingredients for your hair type is crucial for creating an effective hair serum.
- Follow step-by-step instructions to make your own hair serum at home with ease.
- Proper storage and usage tips will ensure the longevity and effectiveness of your DIY hair serum.
- Customise your hair serum to address specific hair concerns such as dryness, frizz, or damage.
Choosing the Right Ingredients for Your Hair Type
Moisturising Ingredients for Dry or Damaged Hair
For dry or damaged hair, you may want to consider using heavier oils such as argan oil, coconut oil, or olive oil, which are known for their moisturising and nourishing properties.
Lightweight Oils for Oily or Fine Hair
If you have oily or fine hair, lighter oils such as jojoba oil, grapeseed oil, or almond oil may be more suitable as they are less likely to weigh the hair down.
Additional Ingredients for Extra Benefits
Additionally, essential oils can be added to provide extra benefits such as stimulating hair growth, reducing dandruff, or adding a pleasant fragrance to the serum. Some popular essential oils for hair care include lavender, rosemary, peppermint, and tea tree oil. It’s important to research and understand the properties of each ingredient before incorporating them into your DIY hair serum to ensure they are suitable for your specific hair type and concerns.
Step-by-Step Instructions for Making Your Own Hair Serum
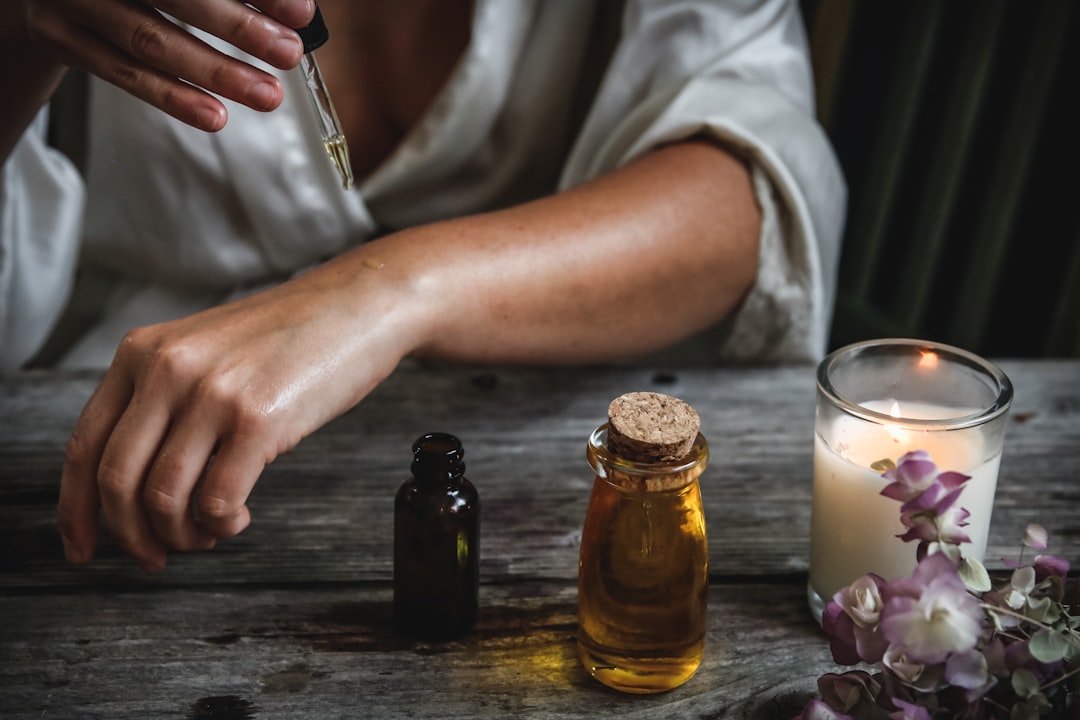
Making your own DIY hair serum is a relatively simple process that requires only a few key ingredients and some basic equipment. To get started, you will need a base oil such as coconut oil, argan oil, or jojoba oil, as well as one or more essential oils of your choice. You will also need a small glass bottle with a dropper or pump for easy application of the serum.
To create your custom hair serum, start by choosing a base oil that is suitable for your specific hair type and concerns. For example, if you have dry or damaged hair, you may want to use argan oil for its moisturizing properties, while those with oily or fine hair may prefer jojoba oil for its lightweight texture. Once you have chosen your base oil, add it to the glass bottle using a small funnel to avoid spills.
Next, add a few drops of your chosen essential oils to the bottle, taking care not to add too much as essential oils are highly concentrated and can cause irritation if used in excess. Some popular essential oil combinations for DIY hair serums include lavender and rosemary for promoting hair growth, peppermint and tea tree oil for reducing dandruff, and ylang-ylang and bergamot for adding a pleasant fragrance. After adding the essential oils, securely fasten the lid of the bottle and shake it gently to mix the ingredients together.
Your DIY hair serum is now ready to use!
Tips for Storing and Using Your DIY Hair Serum
Once you have made your own DIY hair serum, it’s important to store it properly to ensure its longevity and effectiveness. Keep your homemade hair serum in a cool, dark place away from direct sunlight to prevent the oils from becoming rancid or losing their potency. Additionally, using a dark glass bottle can help to protect the ingredients from light exposure and extend the shelf life of the serum.
When using your DIY hair serum, start with a small amount and apply it evenly through damp or dry hair, focusing on the mid-lengths and ends. Avoid applying the serum directly to the roots as this can weigh the hair down and make it look greasy. It’s best to use your DIY hair serum on a regular basis to see noticeable results over time.
Depending on your hair type and concerns, you may choose to use the serum daily or a few times a week for best results. Remember that a little goes a long way with hair serums, so start with a small amount and adjust as needed based on the length and thickness of your hair. With proper storage and usage, your DIY hair serum can provide long-lasting benefits for your hair without the use of harsh chemicals or artificial additives.
Customizing Your Hair Serum for Specific Hair Concerns
One of the greatest advantages of making your own DIY hair serum is the ability to customize it to address specific hair concerns. Whether you are looking to promote hair growth, reduce frizz, add shine, or improve overall hair health, there are countless ingredient combinations that can help you achieve your desired results. For those looking to promote hair growth, essential oils such as rosemary, peppermint, and cedarwood are known for their stimulating properties and can be added to a base oil such as coconut or jojoba oil.
These essential oils help to improve blood circulation to the scalp and stimulate hair follicles, leading to healthier and stronger hair growth over time. If frizz is a major concern for you, consider adding ingredients such as argan oil, shea butter, or avocado oil to your DIY hair serum. These heavier oils provide extra moisture and nourishment to dry and unruly hair, helping to tame frizz and define curls.
Additionally, essential oils such as lavender and geranium can be added for their calming and smoothing effects on the hair. For those looking to add shine and luster to their hair, consider using lighter oils such as grapeseed oil or almond oil in combination with essential oils such as ylang-ylang or bergamot for a pleasant fragrance.
Benefits of Using Natural Ingredients in DIY Hair Serums
Nourishing and Strengthening Hair
Natural oils such as coconut oil, argan oil, and jojoba oil are rich in vitamins, minerals, and fatty acids that help to nourish and strengthen the hair from within. These oils penetrate the hair shaft to moisturise and repair damage, leading to softer, smoother, and more manageable hair over time.
Additionally, essential oils provide various therapeutic benefits such as promoting scalp health, stimulating hair growth, reducing dandruff, and adding a pleasant fragrance without the use of synthetic chemicals. By making your own DIY hair serum with natural ingredients, you can avoid potentially harmful chemicals found in many commercial hair care products such as parabens, sulphates, and artificial fragrances. These chemicals can strip the hair of its natural oils, leading to dryness, damage, and overall deterioration of hair health over time.
Gentle and Customisable
Natural ingredients are gentler on the hair and scalp, making them suitable for all hair types including sensitive or allergy-prone individuals. Furthermore, creating your own DIY hair serum allows you to have full control over the ingredients used, ensuring that they are safe and beneficial for your specific needs.
Precautions and Potential Allergens to Consider when Making DIY Hair Serums
While making your own DIY hair serum can be a fun and rewarding experience, it’s important to consider potential allergens and take necessary precautions when working with essential oils and other ingredients. Essential oils are highly concentrated plant extracts that can cause skin irritation or allergic reactions if used in excess or by individuals with sensitivities. Before incorporating any new essential oil into your DIY hair serum, perform a patch test on a small area of skin to check for any adverse reactions.
Additionally, some essential oils are not recommended for use during pregnancy or by individuals with certain medical conditions such as epilepsy or high blood pressure. It’s important to research each essential oil thoroughly before use and consult with a healthcare professional if you have any concerns about their safety. When working with essential oils, always use them in well-ventilated areas and avoid direct contact with eyes or mucous membranes.
In conclusion, making your own DIY hair serum allows you to create a customised treatment tailored specifically to your unique hair type and concerns. By choosing the right ingredients and following proper storage and usage guidelines, you can enjoy the benefits of natural oils and essential oils without the use of harsh chemicals found in many commercial products. However, it’s important to be mindful of potential allergens and take necessary precautions when working with essential oils to ensure a safe and enjoyable DIY experience.
If you’re interested in debunking skincare myths and learning the real truths about taking care of your skin, you should check out the article “21 Skincare Myths Debunked: The Real Truths You Should Know.” This article provides valuable information on common misconceptions about skincare and offers practical advice for achieving healthy, radiant skin. It’s a great complement to the step-by-step guide to DIY hair serums, as both articles focus on the importance of taking care of your skin and hair.
FAQs
What is a hair serum?
A hair serum is a styling product that is applied to the hair to add shine, reduce frizz, and protect the hair from heat damage. It is usually a lightweight, silicone-based formula that helps to smooth the hair cuticle and improve the overall appearance of the hair.
What are the benefits of using a hair serum?
Using a hair serum can help to improve the overall health and appearance of the hair. It can add shine, reduce frizz, protect the hair from heat damage, and make the hair more manageable and easier to style.
Can I make my own DIY hair serum at home?
Yes, you can make your own DIY hair serum at home using natural ingredients such as carrier oils, essential oils, and other nourishing ingredients. Making your own hair serum allows you to customize the formula to suit your specific hair needs and preferences.
What are some common ingredients used in DIY hair serums?
Common ingredients used in DIY hair serums include carrier oils such as coconut oil, argan oil, jojoba oil, and sweet almond oil, as well as essential oils such as lavender, rosemary, and peppermint. Other nourishing ingredients such as aloe vera gel, vitamin E oil, and silk protein can also be used.
How do I make a DIY hair serum at home?
To make a DIY hair serum at home, you will need to mix together your chosen carrier oils, essential oils, and other nourishing ingredients in a clean, sterilized bottle. You can then apply a small amount of the serum to damp or dry hair, focusing on the mid-lengths and ends.
Are there any precautions to take when using a DIY hair serum?
It’s important to do a patch test before using any new hair product, including a DIY hair serum, to check for any allergic reactions. Additionally, be mindful of the amount of serum you use, as using too much can weigh the hair down and make it look greasy.